How to Patch and Paint Walls Like a Pro
To patch and paint your walls like a pro, we’ll start by evaluating the damage and selecting the proper tools—think putty knives, spackle, and sandpaper for patching and high-quality brushes for painting. Next, we prepare the area by clearing and covering furniture and floors. We’ll tackle patching holes and cracks with suitable fillers, ensuring everything is smooth with a bit of sanding. Don’t forget to apply primer for better paint adhesion! Using the right techniques, we’ll help you master the painting process for a flawless finish. Follow these steps to transform your space into something you’re proud to show off.
Assessing Wall Damage

Before you immerse yourself in patching and painting, it’s vital to assess any damage your walls may have. We need to identify what we’re dealing with to guarantee a smooth, safe refinishing process. Start by examining the entire surface of your walls for any cracks, holes, or signs of water damage. It’s important to address these issues before moving forward, as they could lead to bigger problems down the line.
Look closely for hairline cracks or small puncture holes; these can often be easily filled with spackle or joint compound. However, larger cracks or holes might require a bit more work, including possibly installing new sections of drywall. Also, keep an eye out for any discolored spots which could indicate moisture. This is significant because painting over a damp wall can cause your new paint to peel or develop mold.
If you detect mold, don’t try to handle it yourself. Mold can be hazardous to your health, so it’s best to call in a professional to remove it safely. Once all issues are properly addressed and repaired, your walls will be ready for a fresh coat of paint, guaranteeing a beautiful, lasting finish.
Choosing the Right Tools

Choosing the right tools is essential when preparing to patch and paint your walls. We need to select equipment that not only does the job well but also guarantees our safety. Let’s start with the basics: for patching, you’ll need a putty knife, spackle, and sandpaper. Opt for a flexible putty knife that comfortably fits in your hand, reducing the risk of slips that could cause injury.
For sanding, consider a sanding block or a fine-grit sandpaper. These tools allow for smoother, more controlled motions, minimizing dust and the chance of nicking your hands. When it comes to painting, a high-quality brush, roller, and paint tray are indispensable. Choose brushes with synthetic bristles for water-based paint and natural bristles for oil-based options. This distinction guarantees that the bristles don’t break off into the paint, maintaining a safe and clean working environment.
Additionally, don’t forget a sturdy ladder for reaching higher spots. Guarantee it’s stable and rated for your weight plus any tools you’re carrying. Investing in these right tools not only makes your work easier but also keeps you safe while achieving professional-looking results.
Preparing the Work Area
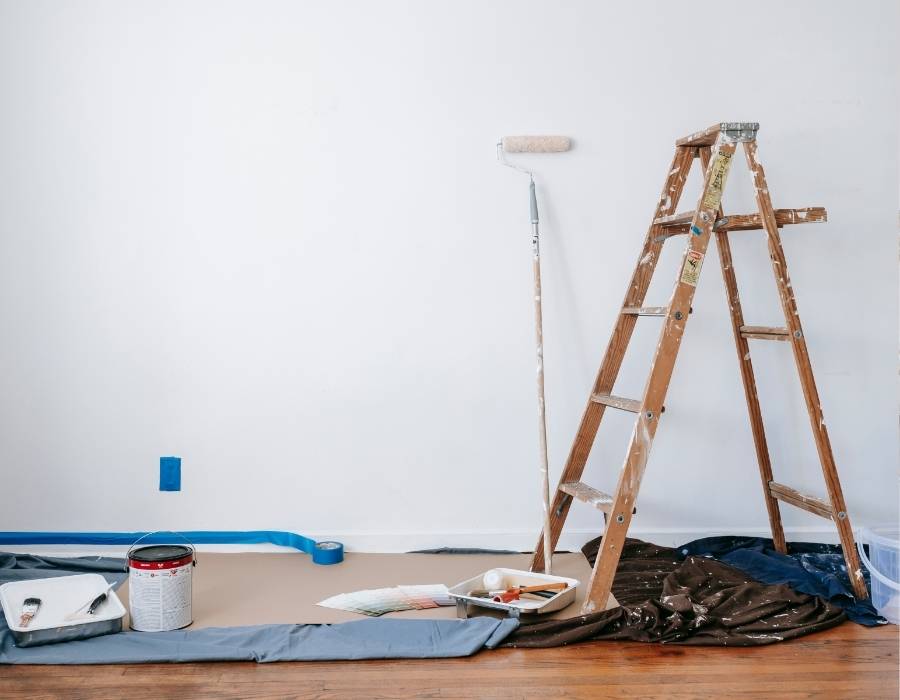
Clearing out the room is the first step in preparing your work area, guaranteeing you have ample space to move and protect your furniture. We’ll also need to shield any remaining items from dust and paint splatters. Let’s start by removing all small items and electronics. For larger pieces that can’t be moved, cover them with drop cloths or plastic sheeting securely taped down.
Next, let’s focus on the floors. Whether you have hardwood, carpet, or tile, laying down a sturdy canvas drop cloth is essential. It’s more slip-resistant than plastic and will prevent any spills from seeping through. Make sure the entire floor area is covered, overlapping the cloths to guarantee complete coverage.
Now, let’s look up. Removing light fixtures, if possible, is a smart move. This prevents accidental paint drips and makes the job easier. If you can’t remove them, cover them carefully with plastic bags secured with painter’s tape.
Finally, we’ll tape off the baseboards, window frames, and door frames with painter’s tape to protect them from stray brush strokes. This step is critical for achieving clean, professional edges.
With these precautions, we’re set to start our project safely and efficiently.
Patching Holes and Cracks
Moving on to patching holes and cracks, we’ll need to confirm each imperfection is addressed to create a flawless finish. First off, let’s guarantee our safety by donning protective gear—gloves and safety glasses are a must.
Now, for small cracks, we’ll use lightweight spackle. Apply it with a putty knife, smoothing it flush with the wall. This will dry quickly, so work efficiently. For larger holes, a wall patch kit is ideal. Start by cleaning the area around the hole to remove any debris—this helps the patch adhere better. Cut the patch to size, slightly larger than the hole, and apply it over the area.
Next, we’ll spread joint compound over the patch using a wide putty knife. Feather the edges to blend seamlessly with the surrounding wall. Remember, the goal here is not just to fill the gap but to make the repair undetectable once painted.
Allow the compound to dry completely, according to the manufacturer’s instructions. It’s essential not to rush this step; drying times vary based on humidity and temperature. We’re aiming for a solid, stable surface to confirm the best paint application later.
Sanding for Smoothness
After allowing the compound to fully dry, we’ll focus on sanding for smoothness. Achieving a flawlessly smooth surface is essential for a professional-looking paint job. We’ll start with a medium-grit sandpaper, around 120 to 150 grit, ideal for removing the rougher ridges without damaging the wall.
It’s important to sand in gentle, circular motions. Applying too much pressure can create dips and grooves, defeating the purpose of this step. As we sand, we’ll constantly check the surface by running our hands over it to feel for any inconsistencies. Once the larger imperfections are gone, we’ll switch to a fine-grit sandpaper, about 220 grit, to finish the surface. This finer sanding helps to create a smooth finish that’s perfect for painting.
Safety is a priority, so we’ll make certain to wear masks to avoid inhaling dust. Let’s also guarantee the room is well-ventilated. Keeping windows open or using a fan can help clear the airborne dust particles. Finally, after sanding, we’ll wipe down the walls with a damp cloth to remove all dust. This prepares the wall perfectly for the next step and guarantees no debris interferes with our paint job.
Applying Primer
With the wall now smooth and free of dust, we’re ready to apply primer. Primer is essential as it guarantees that your paint adheres properly and provides a uniform surface for painting. Before we begin, let’s verify our safety and results with a few important steps.
First, choose a well-ventilated area to work in. Open windows and doors or use a fan to keep the air moving and reduce fumes. Wear protective gear like gloves and masks to shield yourself from chemicals. Now, let’s talk about applying the primer:
- Stir the Primer Thoroughly: Just like emotions stir within us, stirring the primer guarantees that all its components are evenly mixed, leading to a smoother application and better adhesion.
- Apply Evenly with the Right Tools: Use a high-quality roller or brush. Imagine spreading positivity — smooth and even strokes prevent unsightly patches and guarantee a flawless finish.
- Allow Proper Drying Time: Patience is key. Let the primer dry completely before moving on. This step is as essential as giving time to a loved one; it lays the foundation for everything that follows.
These preparatory steps will not only make your walls look great but also keep your painting project safe and effective.
Selecting Quality Paint
Selecting the right paint is essential for achieving a stunning, long-lasting finish on your walls. We’ll guide you through picking a high-quality paint that not only looks beautiful but is also safe for everyone in your home.
Firstly, consider the paint’s composition. Opt for low or zero VOC (Volatile Organic Compounds) paints. These are safer for both your health and the environment, as they minimize the emission of harmful chemicals into your indoor air. VOCs can cause headaches and dizziness, so it’s wise to avoid these risks.
Next, focus on the paint’s durability and coverage capabilities. A high-quality paint covers existing colors and imperfections well, meaning you’ll use less paint and spend less time on multiple coats. Look for paints that offer a balance of viscosity and smoothness to guarantee they spread evenly and adhere well.
Also, think about the finish. Different finishes (matte, eggshell, satin, semi-gloss, and gloss) serve different purposes and affect the room’s ambiance. Matte and eggshell are great for living areas due to their low sheen, while semi-gloss and gloss are ideal for moisture-prone areas like kitchens and bathrooms because they offer better washability.
Choosing the right paint enhances both the aesthetics and safety of your space. Stick with trusted brands that align with these qualities.
Painting Techniques
Having chosen the right paint, let’s plunge into the best techniques for applying it to your walls to achieve a professional-looking finish. Painting isn’t just about brightening a room; it’s about creating a safe, clean space that feels like home.
- Prep with Patience: Take the time to properly tape off trim and cover furniture. This not only protects your belongings but guarantees that your painting job looks crisp and clean.
- Roll with Care: Use a roller for large, even strokes that cover more area efficiently. Start from the middle of the wall and work your way outwards to avoid drips and guarantee an even coat.
- Brush Up on Details: For corners and edges, switch to a smaller brush. This attention to detail will prevent uneven lines and shows that you care about every square inch of your space.
We’ll also focus on maintaining a well-ventilated area while painting. This is vital, not only for your immediate comfort but also to guarantee the paint dries correctly and safely. Remember, taking your time to do things right not only enhances the look of your walls but also guarantees a safer environment for everyone.
Final Touches and Cleaning

Now that you’ve applied your paint, it’s time to focus on the final touches and cleaning up. First, let’s carefully remove the painter’s tape. Pull it back slowly at a 45-degree angle to guarantee a clean edge. If you notice any touch-ups needed, use a small brush to fix these spots with precision.
Next, it’s essential to clean your brushes and rollers. For water-based paints, rinse the tools in warm soapy water until the water runs clear. If you’ve used oil-based paints, you’ll need to use mineral spirits to clean the brushes properly. Always wear gloves to protect your skin during this process.
We should also take care of the leftover paint. Seal the paint can tightly by tapping the lid with a hammer. Label it with the date and the room where it was used for future reference or touch-ups. Store it in a cool, dry place away from direct sunlight.