Refreshing Bathroom Floors Without Retiling: Paint and Stencil Techniques
We understand how tiring outdated bathroom floors can be, but don’t worry, we’ve got a creative solution that won’t break the bank! By using durable epoxy paint and enchanting stencil designs, you can give your floors a stunning makeover without the need for tedious retiling. Begin by choosing a resilient paint that resists moisture and prevents slips, then select a stencil that complements your bathroom’s style. Follow up with thorough prep, applying a robust primer to guarantee a perfect finish. With our easy-to-follow techniques, you’ll reveal the secret to creating a refreshed and stylish bathroom space. Curious about the next steps? They’re just as simple and transformative!
Selecting the Right Paint

When selecting the right paint for your bathroom floors, we must consider both durability and moisture resistance. It’s essential to choose a product that can withstand frequent exposure to water and steam without degrading. Epoxy paint emerges as a standout choice, offering a waterproof finish that adheres strongly to various surfaces. It’s also resistant to mold and mildew, which are common in humid environments like bathrooms.
Additionally, we should opt for a paint that’s slip-resistant to guarantee safety. Bathrooms are prone to wet floors, and a non-slip coating can greatly reduce the risk of slips and falls. Look for paints specifically formulated for floors or those that allow the addition of a non-slip additive.
Let’s not forget about aesthetics. The paint should complement the overall design of your bathroom. Fortunately, epoxy paints come in a variety of colors and finishes, allowing us to achieve the desired look without compromising on safety and durability.
Choosing the right paint is more than just picking a color; it’s about creating a safe, durable, and attractive space. We’re committed to making informed choices that guarantee our bathroom remains beautiful and functional for years to come.
Preparing Your Bathroom Floor
Before diving into the actual painting, it’s important to properly prepare your bathroom floor to guarantee the best possible outcome. Thorough preparation not only makes sure that your paint adheres well but also helps avoid any potential safety hazards during the project. Here’s how we can get started:
- Cleaning: First, we’ll need to clean the floor meticulously. Remove all dirt, grime, and oils using a degreaser or a suitable cleaning solution. This step is essential for making sure the paint sticks properly.
- Sanding: Once the floor is dry, lightly sand the surface to create a rough texture for better paint adhesion. Be sure to wear a mask and goggles to protect from dust particles.
- Repairing: Check for any cracks or chips and fill them with an appropriate filler. This will help achieve a smooth, even surface, which is crucial for a flawless finish.
- Priming: Apply a high-quality primer designed for tile or your specific floor type. This layer will act as a base for your paint to adhere to and will also help in bringing out the true color of your paint.
Choosing Your Stencil Design
With your bathroom floor prepped and primed, it’s time to choose a stencil design that will transform the space. We’ll focus on selecting a design that’s not only beautiful but also guarantees a safe, non-slip surface. Safety is paramount, especially in a bathroom where floors can become slippery.
First, consider the size and scale of the stencil pattern. Larger patterns tend to work well in spacious bathrooms, creating a bold statement. For smaller bathrooms, a more intricate, smaller pattern can add depth without overwhelming the space. Remember, the right scale can influence the overall feel and safety by minimizing visual clutter which can be distracting underfoot.
Next, think about the style of your bathroom. A geometric pattern might complement a modern decor, while floral designs can enhance a vintage look. Choose colors that contrast well with your base paint to guarantee the stencil pops, but ensure they’re in harmony with the rest of your bathroom’s color scheme.
Applying the Stencil
Let’s plunge into applying your chosen stencil to the bathroom floor, guaranteeing every detail aligns with your envisioned design. It’s a process that requires attention to detail, but we’re here to guide you through each step for a flawless finish.
Before we start, here are the supplies we’ll need:
- *Stencil of your choice*
- *Painter’s tape*
- *Stencil brush or roller*
- *High-quality acrylic or stencil paint*
First, make sure your floor is clean and dry. Any dust or moisture can interfere with paint adhesion, so it’s essential to start with a spotless surface. Next, position your stencil where you want the design to begin. Secure it in place with painter’s tape, pressing down the edges to prevent any paint bleed.
Now, it’s time to paint. Dip your brush or roller lightly into the paint; remember, less is more. Apply the paint using a dabbing or rolling motion, being careful not to overload the stencil. This method helps maintain crisp lines and avoids seepage beneath the stencil.
After finishing a section, carefully lift the stencil and reposition it. Align it precisely with the previous pattern to guarantee continuity. Repeat these steps until your entire floor is transformed. With patience and precision, we’ll achieve a stunning, professional-looking result.
Maintenance Tips
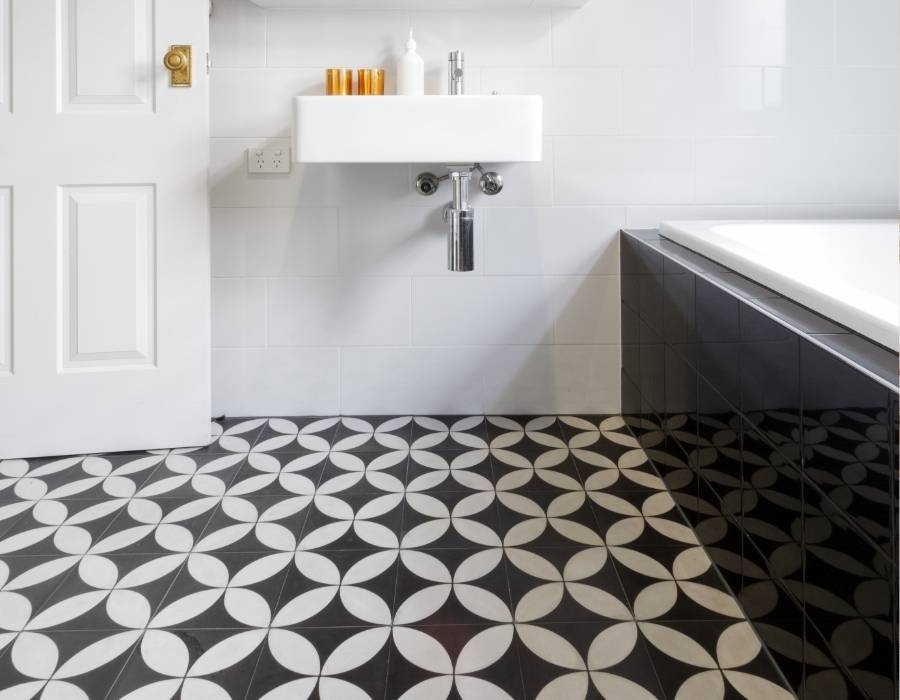
Maintaining your freshly stenciled bathroom floor guarantees its beauty lasts for years. To guarantee this, we’ve got some straightforward tips to keep it looking pristine. First, sweep or vacuum regularly to remove dirt and debris. This prevents scratches and preserves the paint’s finish.
Next, mop with a gentle cleaner. Avoid harsh chemicals, as they can strip the paint and damage the stencil design. We recommend a pH-neutral floor cleaner diluted with water—this keeps your floor safe and spotless without compromising the paint.
It’s also vital to tackle spills immediately. Blot—don’t rub—spills with a soft cloth to prevent staining and water damage. For tougher stains, use a mild soap solution and rinse well to avoid leaving residues.
Lastly, consider placing mats at entryways and near the sink. These mats catch excess water and dirt, greatly reducing wear and tear. They’re a simple addition that can extend the life of your floor.