Creating Custom Light Fixtures: A Step-by-Step Guide
We’ll help you craft custom light fixtures tailored to your space, blending style and safety effortlessly. First, we’ll explore different lighting types like ambient, task, and accent, ensuring the functionality of each area. We’ll select materials like brass and glass for durability and appealing aesthetics. The assembly requires tools like screwdrivers and wire strippers, focusing on a design that complements your room’s mood and scale. Following safety protocols is essential; we’ll guide you through wiring and assembly with precision, ensuring the connection of each part securely. Let’s start creating that perfect ambiance that enhances every corner of your home, uncovering more tips as we go.
Understanding Different Lighting Types

In exploring custom light fixtures, it is vital to first understand the different types of lighting available. We’ve got three main types: ambient, task, and accent lighting. Each serves unique purposes and guarantees safety in our spaces.
Ambient lighting, or general lighting, provides overall illumination to a room. It’s the foundational layer that guarantees we can navigate spaces safely without tripping or bumping into things. When we’re creating custom fixtures, we focus on how to distribute this light evenly to avoid shadows and dark spots.
Task lighting is more focused, designed to light specific areas for activities like reading or cooking. It’s important for safety in workspaces because it helps prevent accidents by providing adequate visibility.
Accent lighting highlights architectural features or artwork. While not primarily focused on safety, it still plays a part by eliminating sharp contrasts in lighting that can lead to eye strain.
When we design custom light fixtures, we make certain that each type complements the others, maintaining a balance that enhances both aesthetics and safety. We’ll guide you through selecting the right combination for your needs, keeping safety at the forefront. Let’s create a space that’s not only beautiful but also secure and comfortable.
Choosing the Right Materials
Selecting the right materials for your custom light fixtures is essential for both aesthetics and durability. We need to choose materials that not only look good but also guarantee our fixtures are safe and long-lasting. Metals like brass, copper, and aluminum are top choices for their robustness and heat resistance. These materials can handle the heat emitted by bulbs without degrading, making them ideal for safety and endurance.
For shades, glass and ceramics are preferred for their ability to diffuse light beautifully while being easy to clean. Avoid plastics as they might not withstand the heat over time, which could pose safety risks. When choosing cables, opt for those that are properly insulated to prevent any electrical hazards. Quality should be your priority here; it’s not just about aesthetics but guaranteeing that every component can safely handle the electricity.
Tools Needed for Fixture Assembly
Gathering the right tools is vital when assembling your custom light fixtures. We’ll need a few key items to guarantee our project is not only successful but also safe. First, a quality screwdriver set, including both flathead and Phillips heads, is indispensable. These will help us handle various screws and fittings with precision.
Next, wire strippers and crimping tools are essential. They’ll allow us to prepare and connect the wiring safely and effectively, preventing any electrical mishaps. Don’t forget a pair of pliers—needle-nose pliers are particularly handy for bending wires and reaching into small spaces.
A voltage tester is another vital safety tool. It’ll let us check that there’s no live current running through the wires before we start working on them, keeping us safe from electric shocks.
For precise measurements and alignments, make sure you have a tape measure and a level. Accurate measuring can make the difference between a lopsided light fixture and one that’s perfectly horizontal.
Lastly, we should have protective gear: safety glasses and gloves. These protect our eyes and hands from sharp edges and any unexpected sparks or debris.
With these tools ready, we’re set to assemble our light fixtures safely and successfully.
Designing Your Light Fixture

We now turn our focus to designing your light fixture, an exciting step where creativity meets functionality. As we commence on this phase, it’s essential to prioritize both aesthetic appeal and practical application. Start by envisioning the space where your fixture will reside. What’s the mood you want to set? This vision will guide your choice of materials and the design’s overall shape.
Next, consider the size and scale relative to your room. A fixture that’s too large can overwhelm a space, while one too small may not provide adequate light. We’ll choose dimensions that balance the room’s layout and the fixture’s purpose.
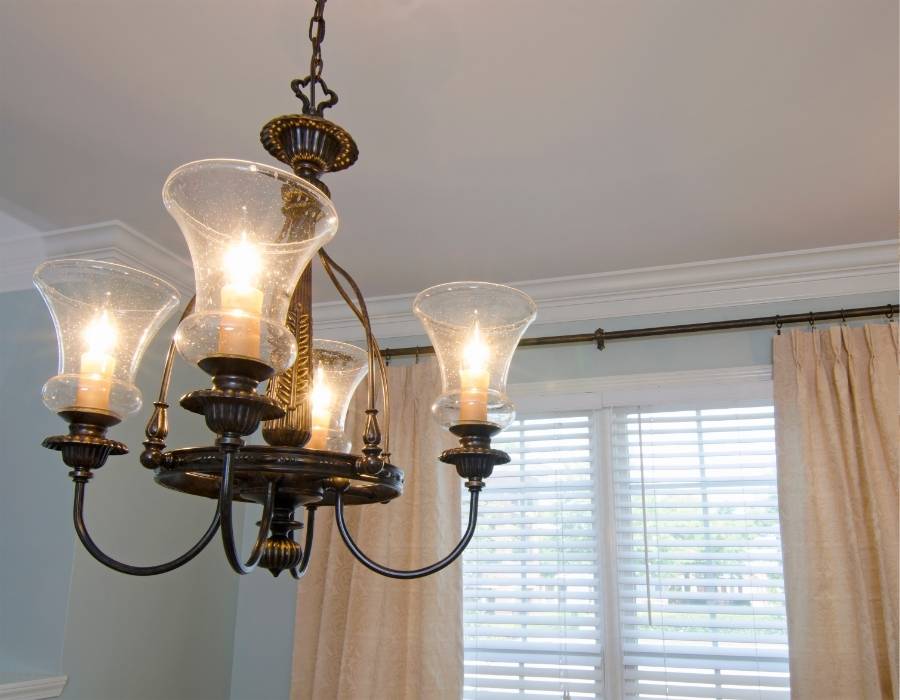
Material selection is next. We opt for durable, high-quality materials that not only look good but also guarantee longevity and safety. Metals like brass or copper offer durability, while glass can introduce a touch of elegance.
Electrical Safety Basics
As we plunge into the practical aspects of creating custom light fixtures, it’s important to emphasize electrical safety basics. Ensuring your safety isn’t just a precaution; it’s a requirement. Before we even touch a wire or tool, let’s get grounded in the fundamentals.
Firstly, always disconnect power at the source before you begin any work. This isn’t just a recommendation; it’s a vital step that prevents any accidental shocks or fires. We’re dealing with electricity, and its power should never be underestimated.
Secondly, use tools with insulated handles. These are designed to protect you by preventing electrical currents from reaching you. It’s a simple choice that offers significant protection.
Moreover, it’s necessary to wear rubber-soled shoes when working with electrical components. They provide an extra layer of insulation, reducing the risk of electric shock.
Lastly, always double-check your surroundings for water sources. Electricity and water are a dangerous combination, so keeping your workspace dry is fundamental to maintaining a safe environment.
Wiring Your Light Fixture
Once you’ve mastered the essentials of electrical safety, it’s time to immerse yourself in wiring your custom light fixture. We’ll guide you through the steps to guarantee a safe and successful installation.
First, gather your tools: wire strippers, screwdrivers, and electrical tape. You’ll also need the right gauge of wire, typically 14 or 16 gauge, depending on your light fixture’s requirements.
Begin by turning off the power at the circuit breaker. It’s vital to verify that the power is off using a voltage tester to avoid any electrical hazards. Next, thread the wires through the fixture’s mounting hardware. We’re focusing on connecting the wires correctly: the black (hot) wire attaches to the black wire of the fixture, the white (neutral) wire to the white wire, and the green or bare (ground) wire to the fixture’s ground screw.
Use wire nuts to secure the connections. Twist them until they’re tight and wrap them with electrical tape for added safety. Double-check that no copper is exposed.
Assembling the Fixture Components
After securing the electrical connections, it’s time to focus on assembling the fixture components. We’ll begin by attaching the base of the light fixture to the mounting bracket. This is essential for providing the structural support needed for our custom fixture. Verify all screws are tightened properly to prevent any wobbling or instability, which can be a safety hazard.
Next, we’ll connect the light fixture arms or supports to the base. It’s important to align these precisely according to the design specifications to maintain balance and guarantee the fixture hangs correctly. We’re using quality materials and following manufacturer guidelines to make certain our fixture will be both safe and stunning.
Now, let’s carefully attach the lighting elements—whether they’re bulbs, LED strips, or other types of lights. Remember, handling these components requires care to avoid damage and guarantee they function as intended. Once in place, secure any decorative elements such as shades or covers. These not only enhance the aesthetic appeal but also protect the bulbs and help diffuse the light evenly.
Installing the Light Fixture
With all components securely assembled, we’re ready to install the light fixture. This is where we bring our creation to life and literally see our efforts shine. Let’s guarantee safety and success by following these clear steps:
- Turn Off the Power: Safety first! Always guarantee the power is completely shut off at the circuit breaker. This step isn’t just a precaution; it’s a necessity. This protects us from electrical shocks and keeps the entire installation process safe.
- Secure the Mounting Bracket: Attach the mounting bracket to your ceiling box. Make sure it’s snug and secure. This bracket will support the weight of our custom fixture, so double-check that it’s firmly in place to prevent any future mishaps.
- Connect the Wires: Match the wire colors and connect them—white to white, black to black, and the ground wire to the green screw on the bracket. Use wire nuts to secure them. This isn’t just about making connections; it’s about guaranteeing reliability and safety in our electrical setup.
Once everything is connected and secure, we’ll mount the fixture onto the bracket. We’re almost there—ready to admire our handcrafted illumination in its designated space.
Troubleshooting Common Issues
Even if you’ve followed all installation steps meticulously, you might still encounter some issues with your custom light fixture. Let’s tackle these problems together, guaranteeing safety and functionality remain our top priorities.
Firstly, if your light isn’t turning on, check the power source. Verify the circuit breaker is on and the fixture is properly wired. Loose connections can often be the culprit, so we’ll want to tighten any loose screws and secure all wire nuts.
Flickering lights can be just as frustrating. This usually points to a faulty connection or an incompatible dimmer switch. We’ll double-check that all connections are secure and consider replacing the switch with one that matches the fixture’s specifications.
If the fixture is overheating, it’s critical to address this immediately to prevent any hazards. This could be due to incorrect bulb wattage or inadequate ventilation. Let’s switch to bulbs with lower wattage and verify there’s enough air circulation around the fixture.
Maintenance and Care Tips

Now that we’ve addressed how to troubleshoot common issues with your custom light fixtures, let’s focus on keeping them in top shape. Proper maintenance not only guarantees their longevity but also keeps them shining as brightly as the day you installed them. Safety and aesthetics go hand-in-hand, and with a few simple steps, you can assure both.
Here are three key tips to help you maintain your custom light fixtures:
1. Regular Cleaning:
Dust and debris can accumulate on your fixtures, dulling their brilliance. Regularly wipe them down with a soft, dry cloth. For glass parts, use a gentle cleaner to avoid scratches. This not only maintains their beauty but also guarantees they light up your space effectively and safely.
2. Inspect Electrical Components:
Once every few months, check the wiring and connections. Look for any signs of wear or damage. This proactive approach prevents potential hazards and guarantees your lights function flawlessly.
3. Update Bulbs as Needed:
Replace bulbs as they burn out or as newer, more energy-efficient bulbs come to market. This not only saves you money in the long run but also enhances the overall performance of your lighting.