

How to Make Your Own Candles: A DIY Decor Essential
We’ll guide you through making your own candles, a perfect addition to your DIY decor projects. Start by gathering quality wax, wicks, and a melting pot. Choose from a variety of waxes like soy or beeswax, each offering different benefits. Secure the wick in a mold or container—glass jars work beautifully—and slowly pour the melted wax, ensuring the temperature isn’t too high to prevent cracking. Customize with your favorite fragrances and colors for that personal touch. Let your candles cure for at least 48 hours to enhance their performance. There’s more to discover to perfect your candle-making craft, ensuring every step enhances your home with a unique glow.
Gathering Your Supplies

Before you can plunge into the art of candle making, you’ll need to gather a few essential supplies. We’re here to guide you through this initial process, making sure you’ve got everything necessary to start safely and efficiently.
First off, you’ll require a melting pot specifically designed for candle making. This tool is important for safely melting your wax as it’s designed to handle high temperatures without transferring heat to the handle. Avoid using regular kitchen pots as they can pose safety hazards.
Next, pick up some candle molds or containers. If you’re aiming for container candles, any heat-resistant container will do, such as glass jars or metal tins. For molded candles, silicone or metal molds are ideal because they tolerate heat well and release the candle easily once it’s set.
You’ll also need wicks. Confirm they’re the right size for your candle type and wax. Pre-waxed wicks with metal sustainer bases are preferable as they’re easier to position and secure in your container.
Lastly, consider a thermometer. Monitoring the wax temperature is essential to avoid overheating, which can be dangerous and affect the quality of your final product. With these items, you’re all set to start your candle making journey safely!
Choosing the Right Wax
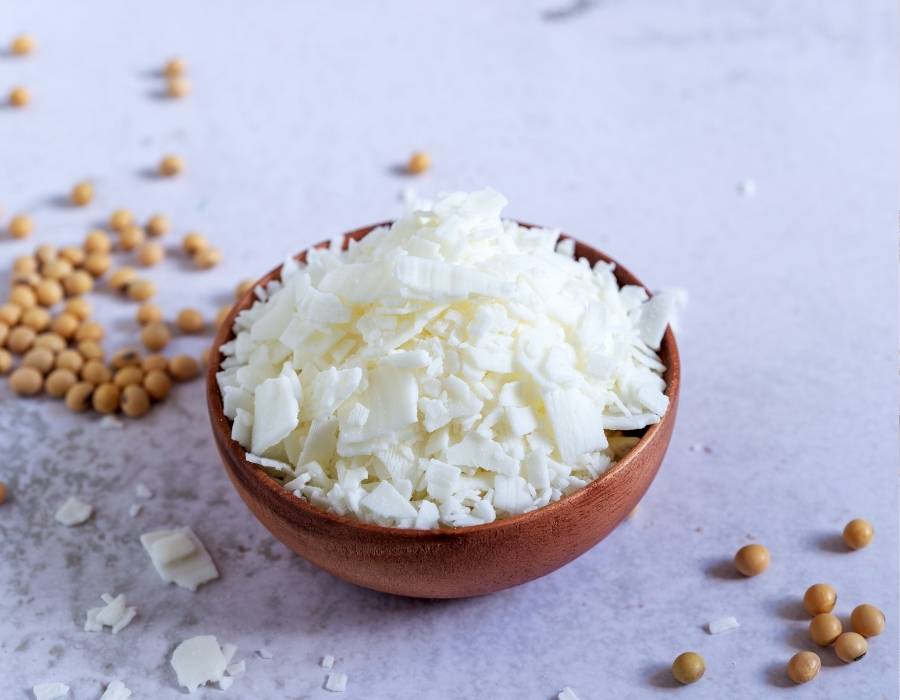
Now that you’ve got your basic supplies lined up, selecting the right type of wax is the next step in your candle-making journey. Wax is the core of your candle, and the type you choose affects everything from the burn time to the scent throw.
First, let’s consider paraffin wax, the most common choice. It’s affordable and readily available, making it a popular option for beginners. However, if you’re leaning towards a more eco-friendly approach, soy wax might be up your alley. It’s made from soybeans, is biodegradable, and burns cleaner than paraffin, producing less soot.
Another great option is beeswax, which naturally purifies the air by emitting negative ions as it burns. Beeswax candles have a subtle, natural honey scent and burn longer than those made from other waxes. However, it’s typically more expensive.
For those interested in vegan alternatives, there’s also palm wax and coconut wax. Both are natural and burn cleanly, but it’s important to source palm wax responsibly due to environmental concerns linked to palm oil production.
Whichever wax you choose, make sure it’s high quality for the safest, most effective candle making. Opt for reputable suppliers to guarantee purity and safety in your finished product.
Selecting Wicks and Holders
Once you’ve chosen the perfect wax, it’s vital to select the right wicks and holders for your candles. The wick is the heart of the candle, so it’s important that we choose wisely to guarantee a clean, even burn. Cotton wicks are a popular choice because they’re known for their consistent burning qualities. Make sure the wick size matches the diameter of the candle — too small, and it won’t melt the wax effectively; too large, and it may cause excess soot or an uneven burn.
For holders, safety and stability are key. We recommend choosing non-flammable, heat-resistant materials such as glass, ceramic, or metal. The holder should be sturdy enough to support the candle and resist tipping. It’s also essential that the holder is the right size for your candle — too large, and the candle could move around; too small, and it might overflow or cause the holder to crack.
Fragrance and Color Options
Often, the most enjoyable part of making your own candles is choosing the fragrances and colors that transform them into personalized creations. Whether you’re aiming for a calming ambiance or a vibrant splash of color, the options are limitless.
Here’s how you can get started:
- Select Safe Fragrances: Opt for high-quality, non-toxic fragrance oils specifically designed for candle making. These guarantee your candles are safe to burn, without releasing harmful chemicals into the air.
- Experiment with Essential Oils: For a more natural scent, essential oils are a great choice. However, you’ll need to use them sparingly as they can be potent. Always check that the oils are safe for burning.
- Choose Vibrant Dyes: Candle dyes come in various forms, such as liquid, powder, and chips. Remember, a little goes a long way! Confirm the dyes are intended for candle use to prevent any safety hazards.
- Test Your Combinations: Before making a batch, test your color and fragrance mixtures in a small quantity to verify the scent is pleasant and the color turns out as expected.
Preparing the Molds
After selecting your favorite fragrances and colors, it’s time to prepare the molds for your DIY candle project. First, let’s choose the right type of mold. You can use silicone, metal, or even glass molds, each offering different benefits. Silicone molds are flexible and easy to remove your candles from once they’re set. Metal molds are great for a smooth finish but might need a releasing agent to help remove the candle. Glass molds provide a beautiful, transparent look, but they’re the trickiest when it comes to candle removal.
Next, we’ll clean and dry our molds thoroughly. Any residue or moisture can affect the candle’s finish, so it’s essential to start with a spotless surface. If you’re using metal or glass molds, consider lightly coating them with a thin layer of vegetable oil or a specialized candle release spray. This step guarantees that you can remove the candle easily without any damage.
Lastly, secure the wick at the bottom of the mold. You can use a wick holder or simply dip the wick’s base in a little melted wax and then press it into the bottom center of the mold. Double-check that it’s centered and straight, as this will affect how your candle burns later on.
Melting the Wax
Moving on to melting the wax, we’ll need to carefully manage the heat to guarantee a smooth, even melt. This step is essential for achieving the perfect consistency in your candles. Let’s walk through the process safely and effectively:
- Choose the Right Heat Source: We recommend using a double boiler rather than direct heat. This setup prevents the wax from getting too hot, which can be dangerous and degrade the wax quality.
- Monitor the Temperature: Keep a close eye on the temperature using a thermometer. The ideal melting point for most waxes is between 160°F to 180°F. Exceeding this range could lead to fires or burns.
- Stir Regularly: Use a heat-resistant spatula or spoon to stir the wax gently. This helps distribute the heat evenly and prevents hot spots. Continuous stirring guarantees that the wax melts uniformly without burning.
- Safety First: Always wear protective gear like gloves and an apron. Hot wax can splash and cause burns, so it’s better to be safe than sorry. Also, verify your workspace is well-ventilated to avoid inhaling fumes.
Pouring the Candle
Now that our wax is melted to the perfect consistency, let’s plunge into pouring the candle. First, secure your wick upright in the center of the container. You can use a wick holder or a simple pencil laid across the top to keep it steady. It’s essential to guarantee the wick stays perfectly centered and straight; it affects how evenly your candle burns later.
Carefully pour the wax into your container, leaving about half an inch at the top. Pour slowly to avoid air bubbles, which can cause issues during the burning process. It’s also wise to pour at a slightly cooler temperature—this reduces the chance of the wax cracking as it sets.
Keep your pouring area well-ventilated and free from any flammable materials. Remember, hot wax is a burn hazard, so it’s best to wear protective gear like gloves and use a funnel or a pouring pitcher with a spout for better control and safety.
Once you’ve poured, don’t move the candle until it’s fully hardened. This will prevent any unwanted spills or wax setting unevenly. You’ve now mastered the art of pouring—next, we’ll guide you through curing and adding those final touches to enhance your candle’s performance and appearance.
Curing and Finishing Touches

Once your candle has fully hardened, it’s time to focus on curing and applying the finishing touches. Curing is essential as it allows the wax and fragrance to bind together, enhancing the scent throw and overall quality of your candle. Here’s how we can make certain our candles are not only beautiful but also safe and long-lasting:
- Let It Cure: Allow your candle to cure for at least 48 hours before using it. If you’ve used soy wax, extending this period to a full week can dramatically improve the fragrance.
- Trim the Wick: Before lighting your candle for the first time, trim the wick to about 1/4 inch. This prevents a large, smoky flame and guarantees a cleaner burn. Always keep it trimmed between burns.
- Smooth the Surface: Sometimes, the surface can get a bit rough after setting. You can use a heat gun to lightly melt the top layer, then allow it to resettle smoothly. Do this in a well-ventilated area to avoid inhaling fumes.
- Safety Check: Verify there are no flammable materials embedded too close to the surface or wick. We want our candles to burn safely without any hazards.


